Watch this video to see how you create your first watermark and apply it to your photos
The entire process is described below
The process of adding a watermark to a photo, image or a picture is simple if you follow these steps using the TSR Watermark Image software:
- Start TSR Watermark Image software, or download TSR Watermark Image here and install it using this guide.
-
Create a set up – and/or make multiple setup
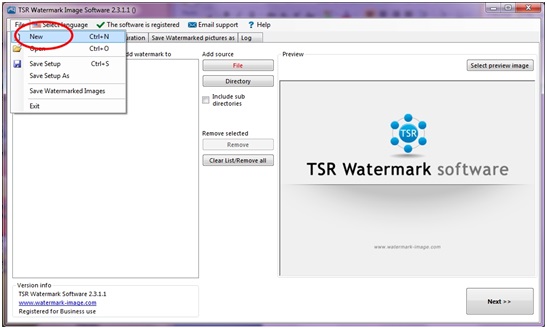
Create a whole new setup and save your source of files, the watermarks (multiple watermarks only for the PRO version) and how you want to save your watermarks: Click on File and New, then Save Setup As and give your setup a name.
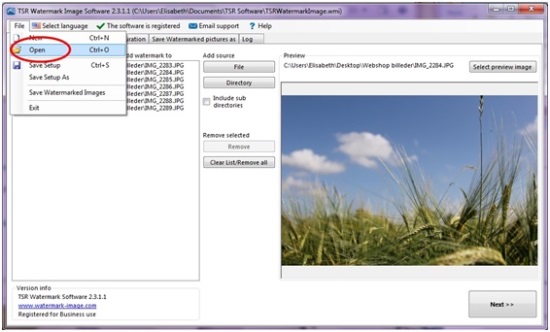
Load an existing set up by clicking on File and Open. Choose your setup.
-
Select Language
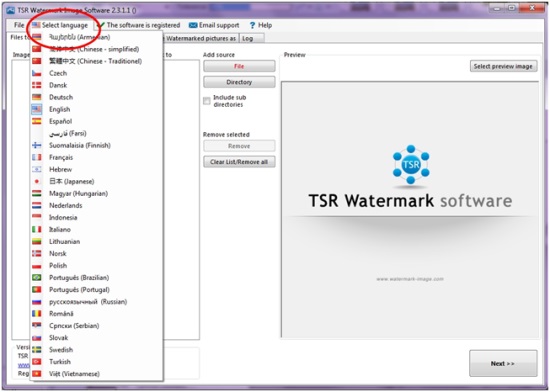
Click Select language and click on your preferred language. TSR Watermark Software will now be in your language.
If you can’t find your language on the list and you want to help translate the TSR Watermark Software, please write an email to anders@tsr-soft.com
-
Adding/selecting images to add watermark to – select one file or a whole directory
Click on “File” or “Directory” and select the images you want to watermark.
You can also drag and drop a file or folder to the file/folder list and the file/folder will be added automatically!

-
Adding/selecting images to add watermark to – select one file or a whole directory
Click on “File” or “Directory” and select the images you want to watermark.
You can also drag and drop a file or folder to the file/folder list and the file/folder will be added automatically!
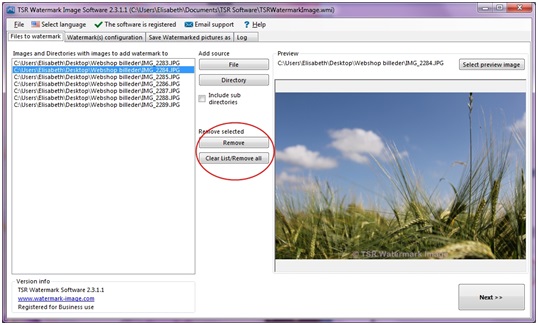
If you want to remove a file or folder from the list of files that will be watermarked, select the line and click "Remove"
To remove all the images on the list: Click “Clear list/Remove all”.
-
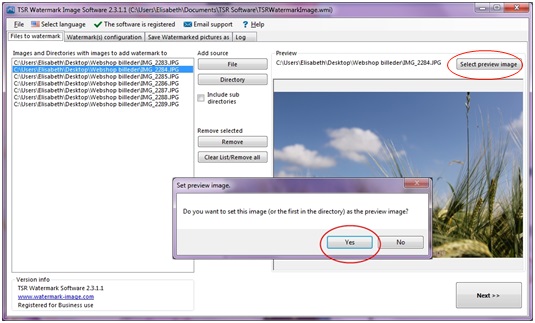
Choosing watermark preview image
Double click on the image you want to use as preview image and click “Yes” in the box.
Alternatively you can click the "Select Preview image" button on the right side of the program window.
-
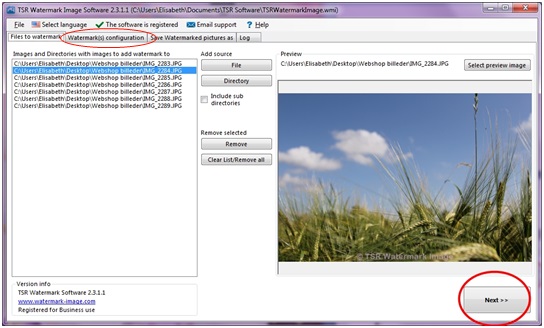
Go to the watermark configuration window
Go to the second window by pressing ‘Next’ at the bottom right corner.
Alternatively you can click the "Watermark Configuration(s) tab".
- Configuring the watermarks
From the watermarker main window you can maintain the list of different watermarks that will be added to the images in the source list.
You can add a new "profile" or watermark, or remove them if you have added to many.
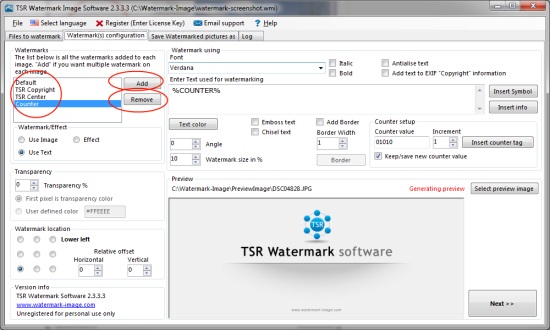
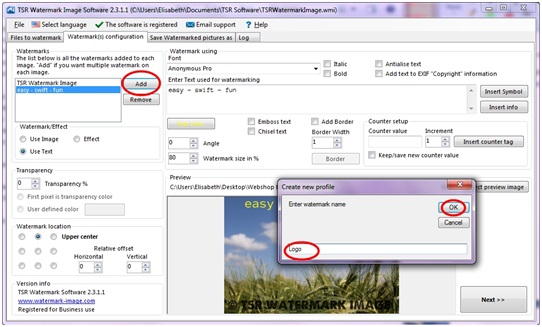
- Add watermarks to an image – (Multiple watermarks is only available in the PRO version)
When you want to add a new watermark to the image, click the "Add" button next to the list of images and enter the name of the watermark profile.
-
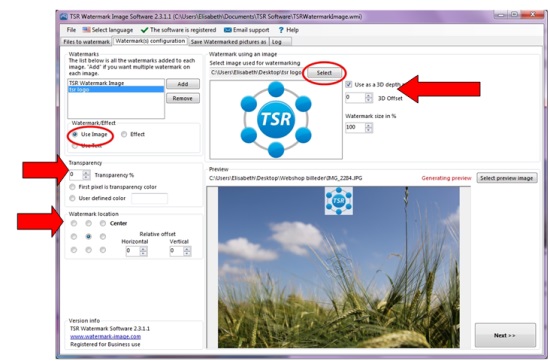
Using an image as watermark – (Multiple watermarks is only available in the PRO version)
You can use an image as watermark on your photos, e.g. a logo or another photos for the effect.
Choose Use Image (see the left circle) and Select (see the right circle) the image you want to use.
You can also choose the Transparency % (arrow nr.1 on the left) you want for the watermarking image. 0% = no transparency and 100% = max transparency and therefore invisible.
You can choose the Watermarks location - see arrow nr.2 on the left.
You can also transform the image you’re watermarking with, to a 3D watermark, see arrow on the right in the picture below.
-
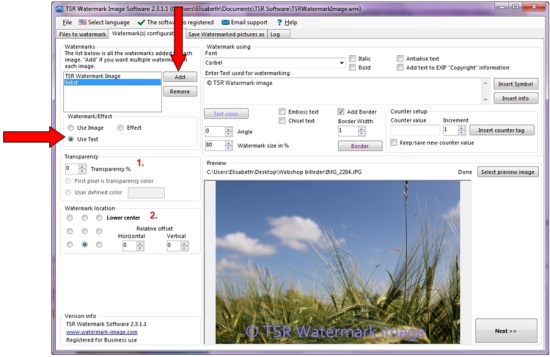
Using text as watermark – (Multiple watermarks is only available in the PRO version)
If you want to watermark your images with text you choose ‘Use Text’.
First Add a watermark and name it – then select Use Text.
1. Transparency % You can also choose the Transparency % you want for the watermarking text. 0% = no transparency and 100% = max transparency and therefore invisible.
2. Watermark location here you can choose the Watermarks location on the image.
-
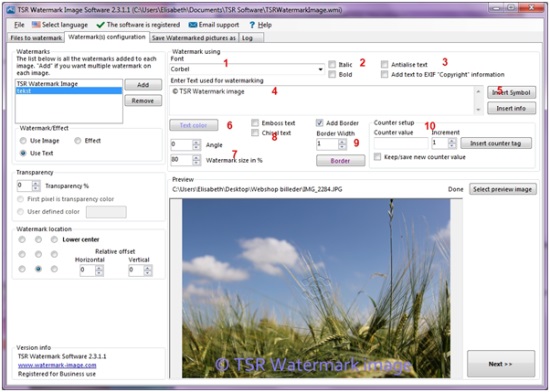
Using text as watermark, more features – (Multiple watermarks is only available in the PRO version)
1. Choose the Font you want to use
2. Select if you want the font to be Bold or Italic
3. Antialise text it will soften the edges around the watermark. Add text to EXIF copyright information will make your text a part of the image info as seen in properties, even if the watermark is removed visually.
4. Here you can write the text you want to watermark the image with
5. Here you can insert symbols such as “© ® ™ ℠ № €”.
6. Select the color of your text
7. Select the angle you want the watermarking text to have: 0= horizontal, 90=vertical. You can also set the Watermark size in %, 100=the whole width/height of the picture, 10= 10% of the pictures width/height.
8. Here you can select Emboss text and Chisel text.
9. Here you can add a border to the watermarking text, set the width of the border (in pixels) and set the color of the border. A border gives the text more depth and contrast, so it’s more visible even though it’s small. Try this: Choose a light color for the text and a darker color for the border.
10. Counter setup adds a number to your picture – here you can choose to keep/save the counter value or start all over when you start the TSR Watermark Software next time.
When you are done – Add another watermark in the left hand corner or press Next in the right hand corner.
-
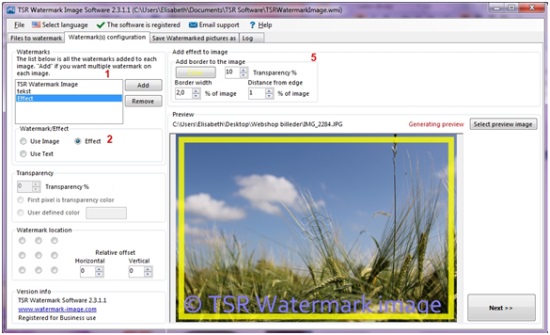
Adding an effect to the watermarked image – (Multiple watermarks is only available in the PRO version)
If you want to frame your picture or give it a border, then you don’t have to run it though another program. You can just select watermark with effect, like shown below
1. Add a watermark and name it
2. Select Effect
5. Select a Color for the border, and set the Transparency % according to your likings. 0% = no transparency and 100% = max transparency and therefore invisible. Border width indicates how many % of the picture you want to be the border. The higher the number, the bigger the border. Distance from edge can also be set. 0=no distance. The higher the number, the further away from the edge the border will be.
-
Choose where to save the watermarked images and format – (Multiple outputs is only available in the PRO version)
Press Next (see the circle) or go to the Save Watermarked pictures as (see the arrow below).
1. Here you can add multiple profiles for multiple places to save your watermarked images – (Multiple outputs - PRO version only).
2. Choose where you want to save the watermarked images to. If you want to Overwrite existing pictures in that file with the same filename – or if you want to Skip and not overwrite any.
3. In Output format you can choose jpeg, png, tiff, bmp, gif. If you select Preserve EXIF Info, the original info of the photo will still be on the picture. The Output Quality can also be set here. If the photo is shot with the camera sideways the TSR Watermark Software can Rotate images based on EXIF info – to rotate it to the right position. Choose source DPI or DPI set to 72.
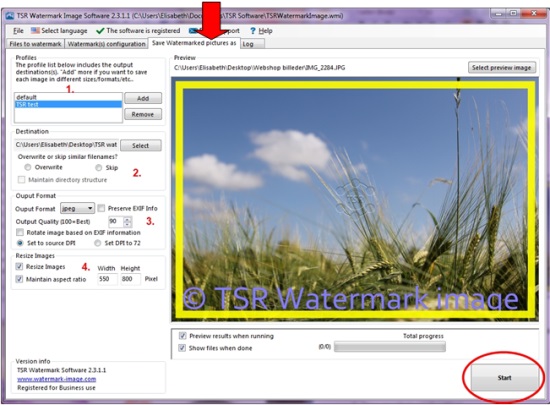
- Now click the "Start" button and watch as your images is being watermarked